


")
Looking for a solution on how to record screen on Apple Mac?
You have landed at the right place. If you’re searching for how to record screen on Apple Mac, this guide covers official methods using built-in macOS tools along with trusted third-party apps. In this comprehensive guide, we have mentioned a simple process of recording screen on Macbook and some third-party screen recorders for Mac.
If you’re an expert in the field or just want to put together a short video, we’ve got you covered. Continue reading to learn about the process.
Why Use Screen Recording on Mac?
Screen recording on Mac helps users capture on-screen activity for different purposes. People use it to create tutorials, share technical issues, record gameplay, or produce online lessons. It also allows teachers and content creators to explain processes visually, making instructions easier to understand.
Want to record screen on iPhone? Check our guide on “How to Screen Record on iPhone“.
How to Record Screen on Mac – Simple Steps
Follow these steps to record screen on Mac using the built-in Screenshot Toolbar:
Here’s what you need to do on a Mac to record screen:
1. To access the toolbar for screenshots, press ⌘ (Command) + Shift + 5.
2. Select the 4th icon to record the whole screen and the 5th icon on the toolbar for screenshots of a particular area. If you look at the icons, you can see what they do.
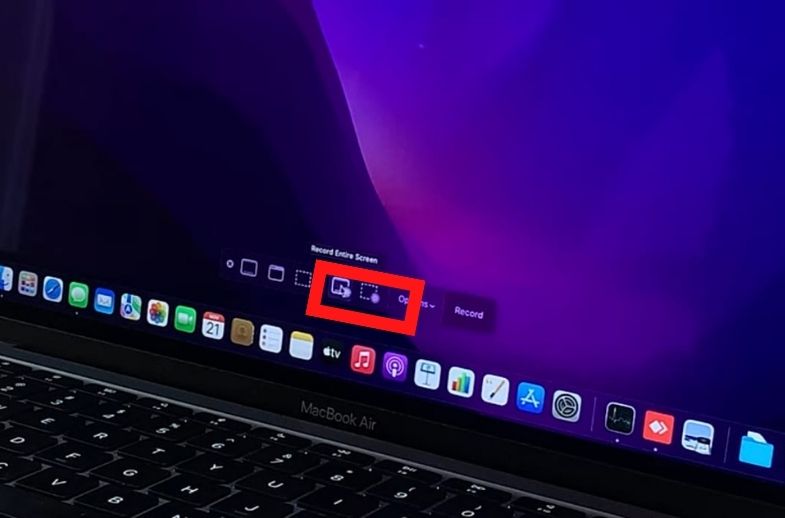
3. Press the record button.
It will start a video recording on your whole Mac screen or only the portion you choose. Tap on the stop icon in the menu bar to put an end to your recording. You may also tap Command in combination with Control and Escape to end the recording on your Mac or hit Escape to stop the recording from starting. Additionally, we will walk you through how to record screen on a Mac’s screen with voice here.
How to use Audio-Built Screen Recording on a Mac
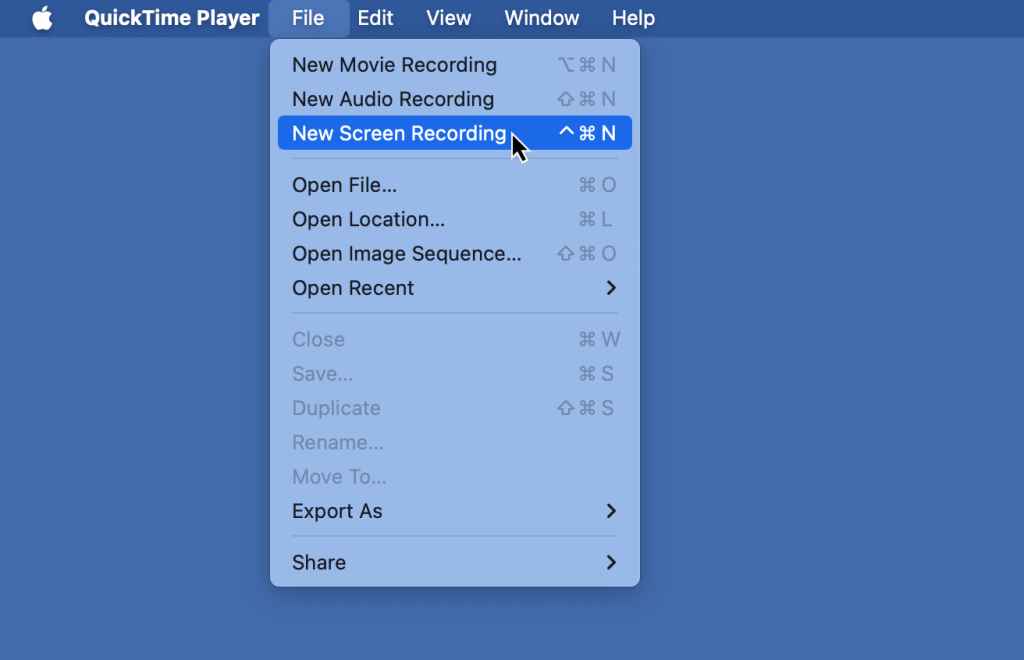
Here’s a guide to recording audio and screen with its built-in feature, QuickTime Player, at the same time on a Mac:
1. Choose File > New Screen Recording in QuickTime Player, or press Cmd + Shift + 5 to open the Screenshot Toolbar.
2. Select the options, and finally choose the microphone you want to use to capture the audio.
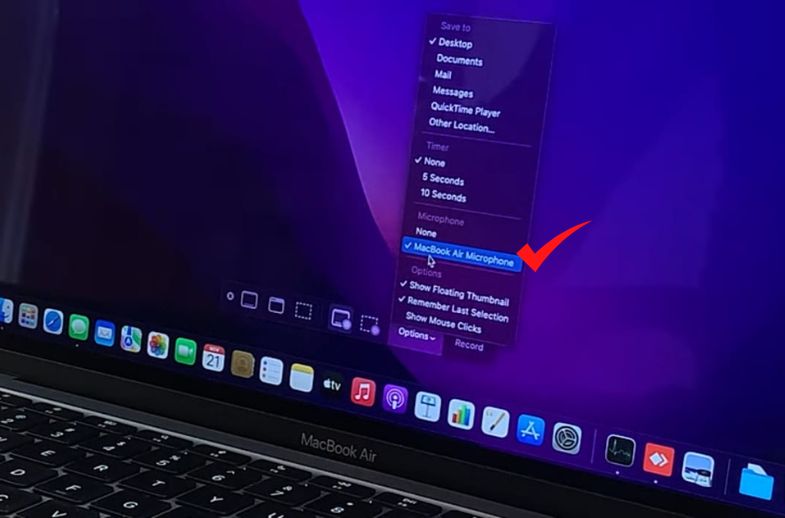
- Pick between recording the full screen or recording a specific part.
- Press the record button.
Your Mac’s screen will start recording sounds from the microphone you’ve chosen. You may also connect an outside microphone, like an iPhone or a USB mic, to capture your Mac’s display along with its audio.
How to Edit and Store Screen Recordings
QuickTime Player does not have the powerful editing features that third-party programs do, but it does allow you to save and trim your recordings. Here’s how to modify and save QuickTime screen recordings.
1. Slide into the screen capture for editing.
2. Select Trim after selecting editing in the menu section.
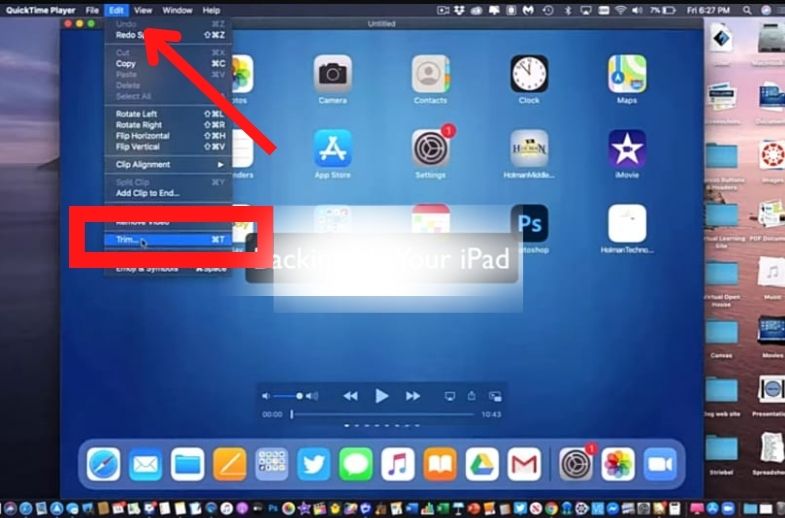
- The video can be trimmed both ways by clicking and dragging.
- To confirm the changes, click Trim.
The modified footage can be saved wherever you want. A common issue when recording with a Mac is a lack of storage space; By modifying your screen recordings, you can free up space to keep what is important.
Best Screen Recorders for Mac
Below are some of the best screen recorders for Mac that you can use to record screen on Mac:
ScreenFlow: A popular option for creating screen recordings with a polished appearance, ScreenFlow is renowned for its intuitive interface and extensive feature set. It has effects, transitions, and tools for editing videos.
Camtasia: Camtasia can also record the screen on Mac. It works especially well for making presentations and video tutorials.
Loom: Loom is a great choice if you need rapid and simple screen recording on Mac.
This guide is based on official macOS screen recording features and practical usage to ensure accurate and safe recording methods.
Final Talk About Screen Recording on Mac
Recording your screen on a Mac is simple, and there are several possibilities to choose from depending on what you require. Whether you decide to utilize built-in features such as the QuickTime Player and Screenshot Toolbar or choose to use third-party programs such as VMaker, OBS Studio, or Camtasia.
Frequently Asked Questions
Use the Screenshot Toolbar and enable microphone from Options.
By default, recordings are saved on the desktop.
Yes, you can use the built-in Screenshot Toolbar or third-party apps.
It may be due to permissions, storage issues, or system settings.

")


